How to Import a Materials / Reference Table on to a Drawing
Fundamentals
Elecdes provides a function to create, in drawing format, combined BOM (Bill of Materials) and cross-reference tables for the components in your project.
The content of the tables are organised similarly to the Bill of Materials Summary (BSUM) report. Each major block of a table represents a component type with the quantity of that component that has been used in the project.
The tables also show the references to the individual components of each type and this reference directs a person examining the table to the location to find that component in the various drawings of the project. Terminal strips in the project also can be included in the tables.
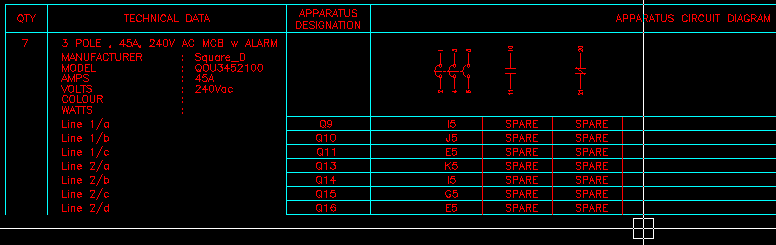
The following example shows a BOM / reference table that contains a single type of component that has been used seven times in a project.
The BOM / reference tables are a final output from a project design. The component quantities and component layout in the tables cannot be updated. If there are changes to the materials list then, in the current version, the tables must be erased and re-drawn. If new components are added to the project, the information will be appended to the existing table. If there are changes to only the references then the references can be updated whenever required.
Procedure
-
Generally you will want to start with a new empty drawing onto which only a border has been inserted.
-
Select from the menu.
-
If the drawing is not in the current project then you will be offered the option to add it to the current project. If you do not add the drawing, the function will terminate.
-
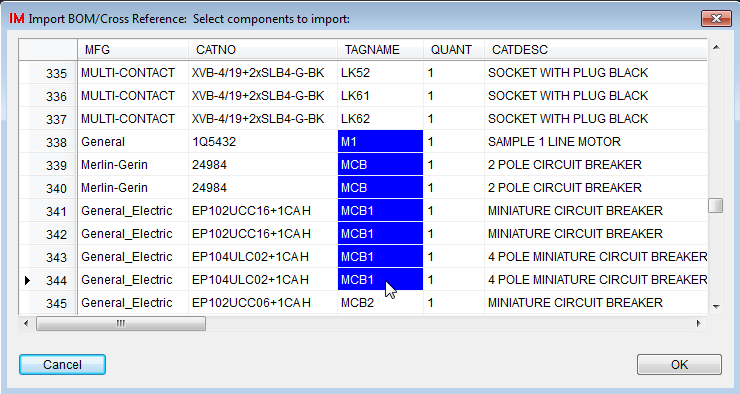
You will be presented with a list of components, extracted from the BOM, from which you are asked to select the components to draw in this BOM / reference table. Each row of the list is one component from the project.
If you right click on the dialog you will be presented with a pop-menu as shown below.
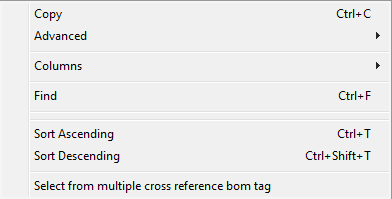
You can click on Copy or press Ctrl+C for copying the selected cells into the clipboard.
You can click on Advanced Copy inside Advance menu entry or press Ctrl+Shift+C for copying a part of text into clipboard record from your BOM record.
You can set the column width by clicking on Set column width inside Columns menu entry.
If you wish to fit the width of the column(s) to the visible text choose the Auto Fit Column Width inside Columns menu entry.
You can find a string by clicking on Find or by pressing Ctrl+F.
-
You can rearrange the order of the components (by sorting) prior to making your final selection.
To sort the entire list by a particular column: Click the left mouse button on the header for the column by which you want to sort the list. The column to sort should be highlighted blue. Click the right mouse button and select either Sort Ascending or Sort Descending from the pop-up menu.
To sort selected rows from the list by a particular column: Use the left mouse button to click and drag a selection down only the rows that you want to sort and in the column by which those rows should be sorted. The fields in the rows and column by which you want to sort should be highlighted blue. Click the right mouse button and select either Sort Ascending or Sort Descending from the pop-up menu.
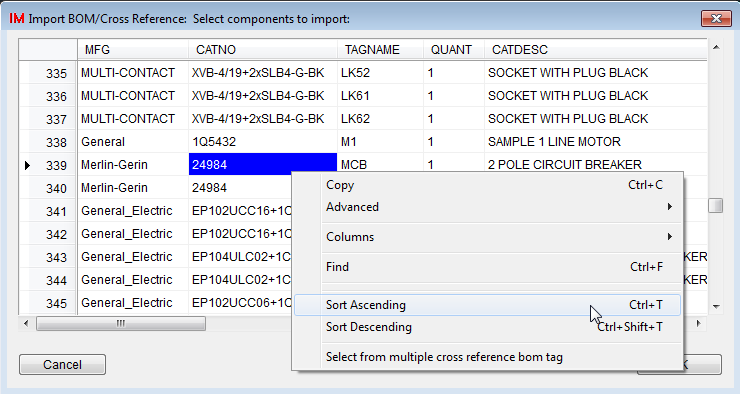
If you scroll across the BOM file you will see the BLOCK and XRF_TAG column, These are Elecdes cross-reference header blocks which will be inserted once you press OK button. Cross-reference header block names start with rheadh_b and rheadh_t.
You can create one or more cross-reference header blocks i.e. rheadh_b named blocks for a component. For these blocks, you are required to type each of their block names separated by semicolon into XRF_BOMTAG column in the catalog entry for the component.
NOTE: If XRF_BOMTAG column in the catalog is BLANK then default Elecdes rheadh_b block will be inserted.
If you require a component to use a particular block for the header for its references, the rheadh_t named block, you can set the required block name in the XRF_TAG column in the catalog entry for the component.
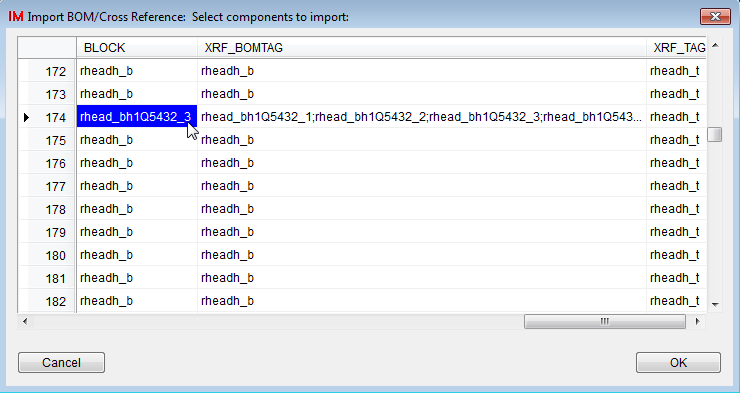
Elecdes will show you the cross-reference header blocks that you added in the in the catalog in XRF_BOMTAG column as shown below.
The block name displayed in BLOCK column represents the cross-reference header to be used for insertion.
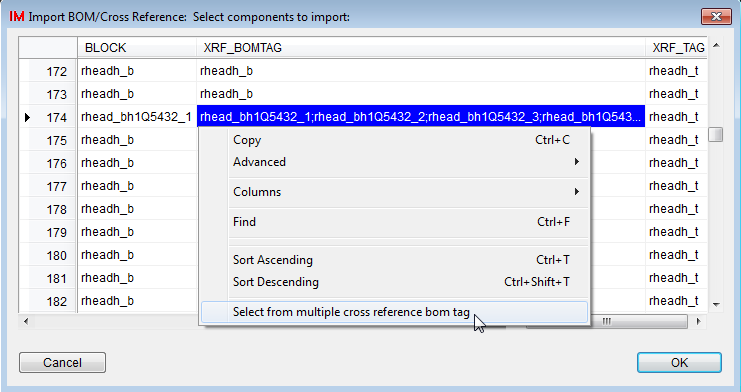
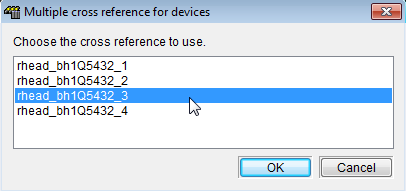
If you wish to select a different header block for selected component(s). Right click on Select from Multiple cross reference BOM tag entry on the pop-up menu.
You will be presented with a list of available headers for the selected component(s). As shown below.
After selecting a block and pressing OK button. You will notice that your BLOCK column will be set with the block you have selected. See the figure below.
-
Select the components that you want to include in this BOM / reference table: Use the left mouse button to click and drag a selection in any column down only the rows that you want to include in the table. At least one column of the rows that you want to include in the table should be highlighted blue.
-
Click the [Ok] button.
-
Elecdes will ask you to pick the position at which the BOM / reference table should be placed. You may pick a point or type in a point.
The drag box shows the size of the header block for the BOM / reference table.
If a BOM / reference table header block (bhead) already exists on the drawing then this step is skipped and the new table will be inserted under the existing header block.
-
Elecdes will insert the drawing blocks for the table header (bhead) and for the components that were selected.
-
Elecdes will run the cross-referencing function for the current drawing. This will populate the reference lists next to the rheadh_t cross-reference header blocks that were inserted.
The examples in the pictures above produce the table shown below.
-
Repeat the procedure on another drawing to insert the materials / reference table for the next group of components.
Required Cross-Reference Preferences
EDS stores and maintains a separate set of preferences for constructing a BOM / reference table. The set of BOM / reference table preferences can be modified as follows:
-
Select from the menu.
-
Click on the [BOM Table Settings] button at the bottom left.
-
Select the Options tab.
-
Adjust settings as required.
All spacing and scaling settings in the options tab will effect the layout of the table in the same way that they would have effected a normal cross reference for example the "Additional Per Phase" setting adds space for each phase of a multi phase component. The Ebase customisation manual details the use of these spacing options.
By default we have provided a set of spacing values that will produce a tidy table however you can change these settings as you please.