How to Place an Array of Zones Sized by Picking with the Mouse
General
The zone dialog allows you to place an array of zones by specifying the number of rows and columns and picking the bounding rectangle for the array with the mouse.
Procedure
-
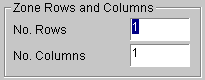
Enter the number of rows and columns that you wish to have in your array of zones. Note that setting both rows and columns to one will result in the creation of a single zone.
-
Make sure Pick on Screen is ticked.
-
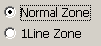
Choose the type of zones that you wish place. Either Normal or 1 Line
-
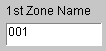
Choose the name of the first zone in the array. The zones in the area will be numbered in sequence based on this initial name. The Naming Sequencer will provide this value.
-
Configure the zone symbol that you wish to use. See How to Configure the Zone Symbol.
-
Click on the OK button.
-
Pick the top left corner of the area requiring zones.
-
Pick the bottom right corner of the area requiring zones.
-
Elecdes will construct the array of zones, automatically sized to fit the defined rectangle.