How to place a 2D GA Symbol for Existing Components
Procedure
To begin placing a 2D GA Symbol for existing components in the project, use one of the following methods:
 Click the Place 2D component button on the 2D Panel Layout Components menu or toolbar.
Enter INSERT2DCOMPONENTGA into the AutoCAD command window.
Select the existing component by picking it on the drawing, or press the letter “T” to type the name and location and you will be presented with a filter dialog like shown below.
If you choose to type the name and location, you can type partial names or use a wildcard to match components. For example, PLANT* will find PLANT1, PLANT2, PLANT110 etc.
Filters must use Specmatch syntax.
You will be presented with a list of views for the components you have selected or typed as shown below.
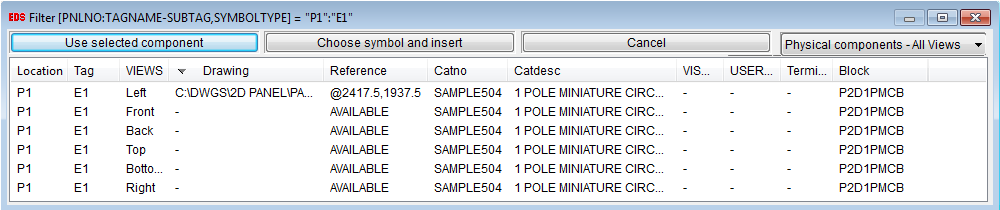
If you do not type a name and location and simply press enter then you will be presented with a list of views of all the components use in the current project.

Double click on any view of the 2D component or press the button "Use selected component"
If you have used a component which has no corresponding 2D component symbol defined in the BLOCK2D column of its catalog record, then a default block will be used. For example, if a mounting plate has no corresponding 2D block then the default plate “VIP2DDEFAULTPLATE.DWG” will be used. Similarly, “VIP2DDEFAULTDEVICE.DWG” for devices, VIP2DDEFAULTPANEL.DWG for panels, and VIP2DDEFAULTACCESSORY.DWG” will be used for accessories.
You will be presented with a dragger with the selected block outline and the block will be inserted where you click the mouse.
While inserting you can use TAB button to rotate the selected block 90 degrees in the clockwise direction.