How to Raise Issues in the Project
Issues are notes and instructions about components and database reports that can be viewed by all users. A user can be granted the permission to raise issues even if otherwise they have only read access to the project. In this way, a user that cannot directly modify the components can still leave notes about modifications that are required.
Raising an issue does not modify the database record for the component; the data for raised issues is stored in the Raised_Issues table.
Opening the Raised Issues dialog
Raised issues are created, viewed and resolved from the Raised Issues dialog, which is shown when you click the toolbar button  or
or  .
.

The appearance of the toolbar button indicates whether or not there are unresolved issues.
indicates there are no issues or all existing issues have been resolved.
indicates that there is at least one unresolved issue.
The Raised Issues dialog is modeless. It can remain open while you work in the main window. Click to close the Raised Issues dialog.
Raise an issue
Only users with user access level "Raise issues" or "Request diagram generation" can create new issues. This option is not available to read-only users.
Click the issues toolbar button
or to open the Raised Issues dialog.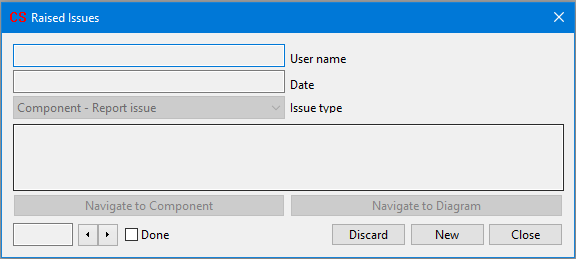
Click .
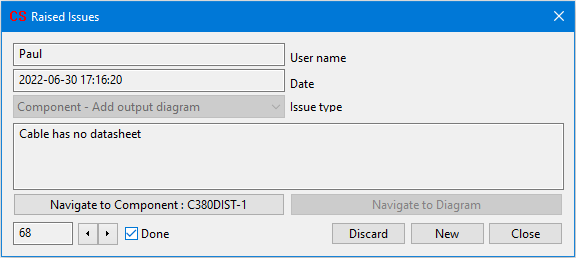
Enter your user name and choose the most appropriate issue type from the list. You cannot leave the user name field blank.
Type as much or as little detail as necessary to describe the issue into the main field. You cannot leave this blank.
If the issue relates to a specific component, click and choose that component to create a link from the issue.

When you are satisfied with your new issue click .
View raised issues
All user access levels, including read-only, can view issues that have been raised.
Click the issues toolbar button
or to open the Raised Issues dialog.The Raised Issues dialog will show the first issue that has not been resolved (i.e. not marked as Done).
Use the and buttons to browse to earlier or later issues that have been raised.
If the issue has a linked component, you can click to select that component in the tree in the main window of Cable Scheduler.
Click if you want to close the Raised Issues dialog.
Mark an issue as resolved
Only users with user access level "Write" can resolve issues. This option is not available to any type of read-only user, including those with the user access levels "Raise issues" and "Request diagram generation".
Click the issues toolbar button
to open the Raised Issues dialog and use the and buttons to browse to the appropriate issue.If the button appears as
then there are no unresolved issues to attend to.Tick the Done checkbox to mark an issue as resolved.
Discard an issue
Only users with user access level "Write" can discard issues. This option is not available to any type of read-only user, including those with the user access levels "Raise issues" and "Request diagram generation".
Click the issues toolbar button
or to open the Raised Issues dialog and use the and buttons to browse to the appropriate issue.Click the button to discard the current issue.
The record for that issue will be permanently deleted from the Raised_Issues table.

You can also use the drop down menu of the button to discard multiple issues. The drop down menu offers the option to discard all of the completed diagram generation issues, or all of the completed issues.