How to Modify the Database Structure
Instrument Manager provides this tool to add, delete and modify columns in the component ratings tables. This avoids the need to learn and use another program for the most common changes you would make to a project database. The tool also provides features specific to Instrument Manager, for example synchronising ratings tables with output diagram templates.
Procedure
Ensure no other users have this project open and ensure they will not open it during the addition or removal of columns.
From the menu, select .
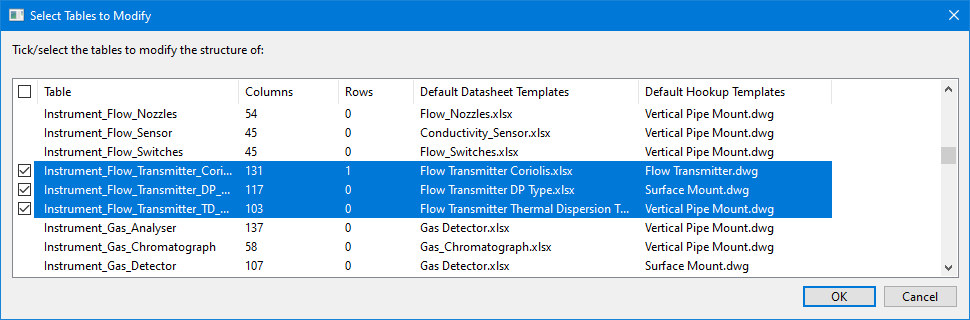
Select one or more tables to modify then click .
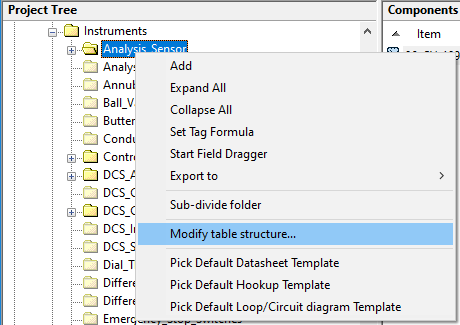
Alternatively, you can edit the ratings table for the folder currently selected in the tree if you right click on the folder and choose from the pop-up menu.
The existing columns in the tables are loaded, along with column references from the datasheet and hookup diagram templates used by the components in the tables.
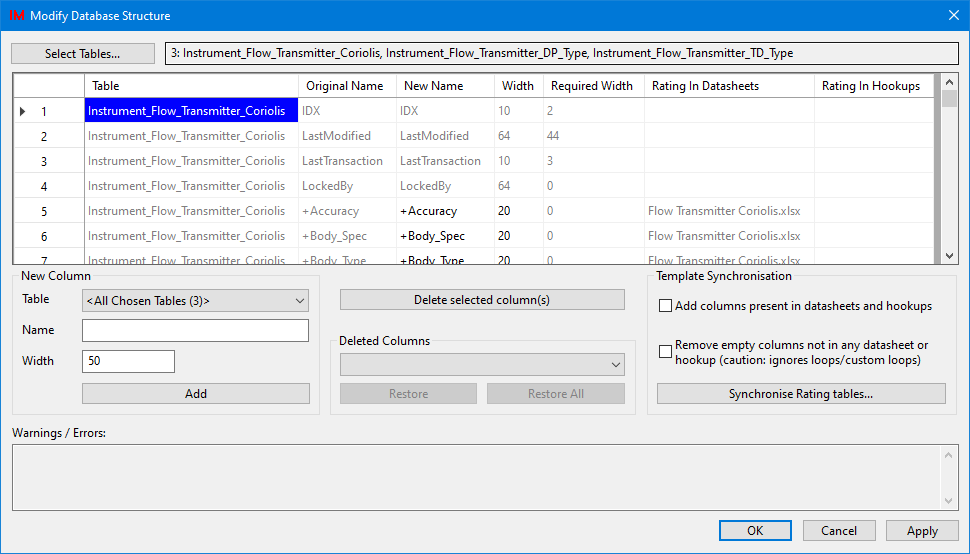
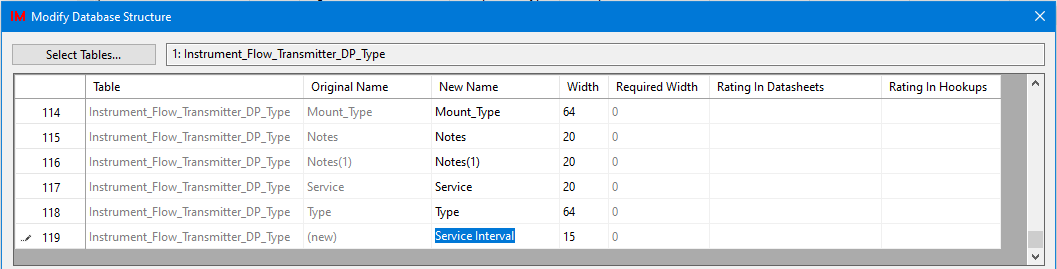
Each row in the list represents one column from one of the selected tables.
Table and Original Name show the containing table and the original name of the column. If the column is renamed then the new name is under New Name.
Width shows the current maximum width of text that the column can contain. This is the column width in the database table definition.
Required Width shows the width of the longest data value entered into that column in the table. If you reduce the column width below this value then existing data will be truncated.
Rating in Datasheets and Rating in Hookups show the names of any datasheet or hookup diagram templates that refer to the column and that are used by the existing component records in the table.
Warnings / Errors, at the bottom of the dialog, shows details for any of the changes that are incorrect, e.g. duplication of a column in one table.
Right click on the list to see various common editing and sorting tools for grid editors. Most of these are the same as the editing options in Database Editor. You can use these tools as required to help you build names for columns.
Click to change which tables are being edited. If you have unsaved changes you will be prompted to apply them before changing tables.
Click to save your current changes. After saving you can continue to make other changes or select other tables.
Click to close the database structure editor. If you have unsaved changes you will be prompted to apply them.
Click to discard any unsaved changes and close the database structure editor.
Add a new column to one table or all tables
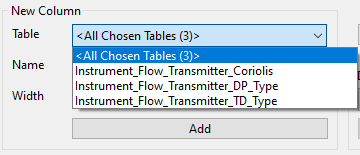
Choose which table the new column will be added to.
You can choose to have the new column added to all of the currently selected tables by selecting , or select any one specific table from those that were initially selected.
Enter a Name for the new column and enter the Width of text that the column can contain.

Click to add the new column to the selected table(s).
The entry for the new column in each selected table will be added to the bottom of the list.

Original Name in the list will show (new) for the new columns.
If the column already existed in any of the selected tables then it will not appear as a new entry for that table.
The tables will not be modified until you click , or click and choose to apply the changes.
Quick addition of a column
If you are modifying only one table, click anywhere on the last entry in the list then press to add a new mostly empty row to the list.
You define the new column in this new row in the list.
On the new last row, click into the empty cell under New Name and enter a name, then under Width and enter the width for the new column.
The tables will not be modified until you click , or click and choose to apply the changes.
If you have pressed at the bottom of the list and created an empty entry for a new column that you do not want, you can click on that row and click to remove it. However, it is safe to ignore unwanted empty rows since database structure editor will not add a column with no name.
Rename a column or change its witdh
In the list, on the row for the column that you want to change:
Click on the column name under New Name and change the column name.
Click on the number under Width and change the column width.

The tables will not be modified until you click , or click and choose to apply the changes.
Delete columns
In the list, click and drag to select the rows for the columns that you want to delete.

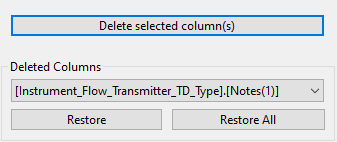
Click .
The rows for those columns will be removed from the list.
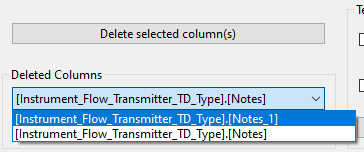
Existing columns that have been deleted are added to the combo box under Deleted Columns, from which they can be restored prior to applying the changes.
New columns are simply deleted.
The tables will not be modified until you click , or click and choose to apply the changes.
After you click , the columns are removed from the database table. They are also removed from the combo box since they can no longer be restored with data (although you can re-create a column with the same name).
Restore deleted columns (before applying changes)
The tables are modified only after you click , or click and choose to apply the changes. Prior to that you are staging the changes that you want to make to the tables. If you have prepared to delete columns that you now do not want to delete, and you have not yet applied the changes, you can restore those column definitions to the list.
Either, select a single column to be restored from the combo box under Deleted Columns then click the button.
Or, click to restore all of the columns that you have marked to be deleted (but have not yet applied).
Synchronise with output diagram templates
The majority of the columns in the ratings tables are used to store information to show on output diagrams, in particular datasheets and hookup diagrams. The database structure editor can help you to synchronise the columns in your database tables with the references to columns in formulae on the datasheet and hookup diagram templates.
The Access database format has a limit of 255 columns per table. If you are customising your diagram templates you may find that you need to add your own columns and therefore need to delete unused columns from the ratings tables to remain below this limit.
Tick Add columns present in datasheets and hookups if your diagram templates refer to columns that are not in your ratings tables and you want to add storage for the data to show in those formulae on the diagrams.
Tick Remove empty columns not in any datasheet or hookup if your ratings tables contain columns that are not being used on your diagram templates and you want to remove unused columns from your tables.
Columns that have values (are not empty) will not be deleted since they are used, even if their data is not shown on the datasheet and hookup diagrams.
Note that this synchronisation does not check loop diagram templates. Take care to check if ratings table columns that are suggested to be deleted actually are used (but only on loop diagrams) and therefore should not be deleted.
Click
The procedure will search for all unsynchronised columns.
A dialog will be shown to choose columns to be added, and a separate dialog for columns to be deleted. In each dialog, select only those columns that you want to add or delete.
Entries for new columns will be added into the list of columns on the dialog.
Entries for columns to be deleted will be removed from the list on the dialog and added to the combo box under Deleted Columns. You can choose to restore them at this time if you have mistakenly marked a column to be deleted.
The tables will not be modified until you click , or click and choose to apply the changes.
After you click , the database table is modified.
The Deleted Columns combo box is emptied since those columns can no longer be restored (although you can re-create a column with the same name).