How to Insert Part of an Existing Component
Fundamentals
As long as one subcomponent of a relay or at least one cable core (conductor) has been inserted onto any of the drawings in the project, you can use the "Insert subcomponent" function to quickly choose and insert any of the unused subcomponents of the relay or spare cores of a cable (conductors). This function bypasses the standard insertion steps of choosing a symbol, entering the name and choosing a catalog specification.
Cross reference window contents
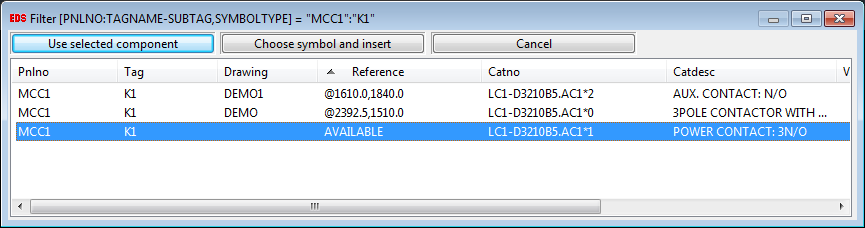
For relays the listing will include the subcomponents (coils and contacts) that are listed in the catalog for that relay. For cables the list will include spare cores (conductors). Subcomponents that have already been inserted into the project will show the drawing name and insertion point in the Reference column.
The list will also display the contents of any attributes with "DESC" in the attribute name e.g. DESC_1, DESC_2...

All of the other subcomponents are available to be placed in the project.
Relay subcomponents and spare cores (conductors) that have not been inserted into the project will show "AVAILABLE" in the Reference column. You should select from the subcomponents or spare cores (conductors) that are listed as "AVAILABLE".

If the drawings in the project contain any modular subcomponents [e.g. a detachable auxiliary contact block] with the same tagname, they will also be listed.
The order in which the entries are listed can be altered by sorting the list. The list can be sorted in either ascending or descending order for any of the columns of data displayed in the list. To sort the list by a column, click on the heading for that column. To sort the column in reverse order, click on the column heading a second time.
Any components in your "Cable Scheduler" or "Instrument Manager" databases that are in your current project will be displayed in this list if it is NOT present on your DWG files. You will NOT however be able to navigate to view these components as they are not viewable in a CAD session.
Procedure
-
Select from the menu.
-
Select the existing component by picking it in the drawing window, or press the letter "T" to type the name and location.
If you choose to type the name and location, you can type partial names or use a wildcard to match components. For example, CB1* will find CB11, CB13, CB110 etc.
Filters must use Specmatch syntax.
-
The Cross-Reference Window will be displayed.
-
Select any subcomponent that is marked as AVAILABLE.
-
Click [Use Selected Component] when you have selected the desired subcomponent from the list.
-
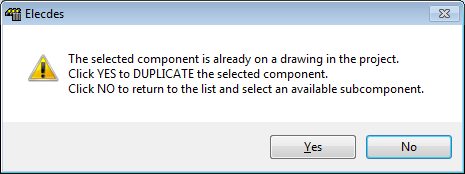
A warning will be displayed if you select a relay subcomponent that has already been inserted into the project. Click No if you have made a selection error. Click Yes to duplicate the symbol.
For components other than relays (e.g. switches, wires, cable cores (conductors), terminals) the cross-reference window will show where symbols for that component have been inserted into the project.
As these components do not have a subcomponent structure in the catalog, there will be no entries in the list marked AVAILABLE.
If you wish to insert a duplicate symbol for a component, then you may select one of the existing symbols and then click [Use Selected Component]. You will be warned that duplication will occur if you proceed. The symbol will be inserted with the same catalog specification as the selected existing symbol.
-
You must then select the insert point. This is the same procedure as a standard symbol insertion.
-
The symbol will be inserted with the catalog specification for the available subcomponent that you have selected.
Elecdes will choose the symbol to insert based on your current Cross Reference symbol style. For example, "HICRC2.dwg" will be inserted for a normally closed relay contact if the IEEE symbol standard is chosen.
To change the current symbol standard, see How to Configure the Cross Reference Settings.
-
The function will return to the Cross Reference Window, from which you can select another subcomponent to insert.
-
To exit, press the Cancel button.
Symbols with no cross-references
If the selected TAGNAME is not in your project, the following message will be displayed:

This may also occur if your current drawing is not included in your Elecdes project.
Click the OK button to clear the message.
The function will repeat from the symbol selection step, allowing you to select another symbol.
See also
How to insert components directly from the catalog.